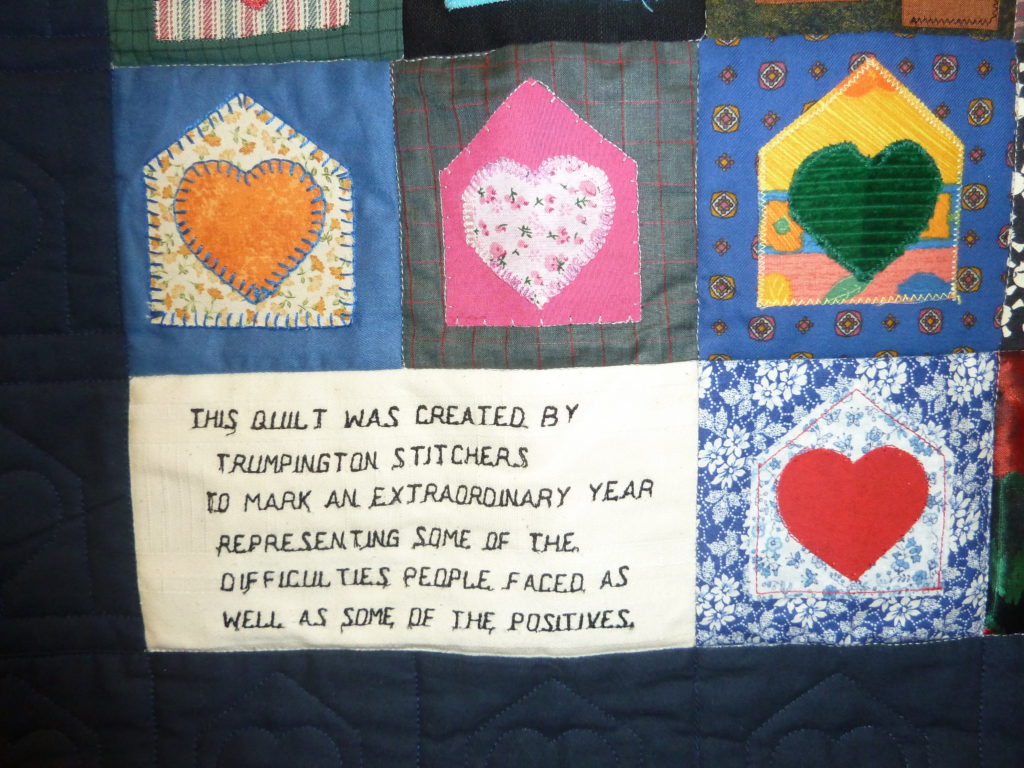
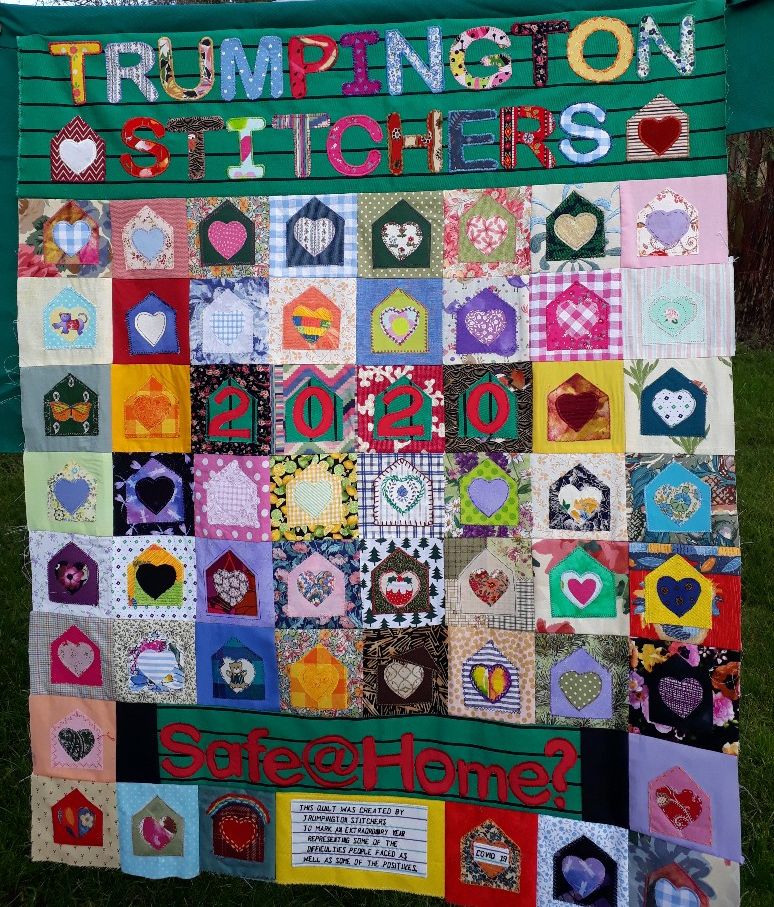
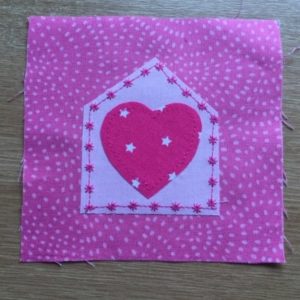
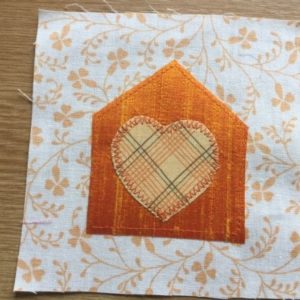
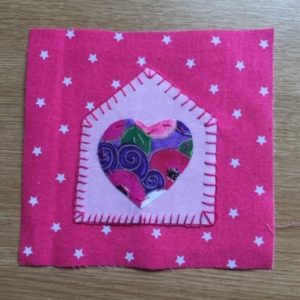
This lovely winter project to mark our first year of Covid gave us an opportunity to come together on a shared project during difficult times when we couldn’t meet physically. It consists of squares stitched individually at home and then joined together. The design of a heart in a house represents the public health message that we would be “safe at home”. For some of us there were many challenges and difficulties in being at home so much, and 35 of the squares were adapted to show these experiences, ranging from over-eating to domestic violence.
The final quilt consists of 144 squares of 10cm each, and it is now hanging in the cafe area at Clay Farm Centre. We had enough squares left over to make a smaller quilt, which we use at public events and as a teaching aid.
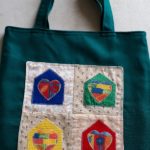
The design can be used to make bags, table runners and small wall-hangings, as illustrated below. Instructions for how to make your own squares are given below the photos.
Grateful thanks for permission to use the original design by Jane Charles of Wolverton Old School


Instructions for making squares
Materials required
You will need:
3 different small pieces of fabric – medium weight fabric such as polycotton works best
Bondaweb.
Threads.
NOTE about printing the Templates provided:
print on the Full Page setting not the Fit to Size setting
There is a 5 cm line at the bottom left of the page so that you can measure and ensure you have printed to the correct size.
WHAT TO DO
Step 1: 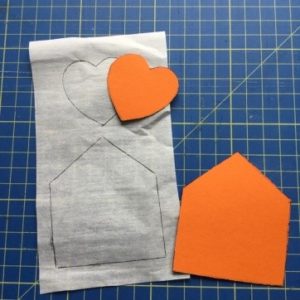 Using the templates provided, trace around the house and heart shapes onto the right side (dull smooth side) of a piece of Bondaweb. Also cut a square of fabric that is 12cms (this allows 1cm seam allowance for joining together with other squares).
Step 2: Cut out the Bondaweb shapes leaving a small margin around them (this means the glue will adhere to the fabric at the edge of the shape when it is cut, preventing fraying).
Step 3: 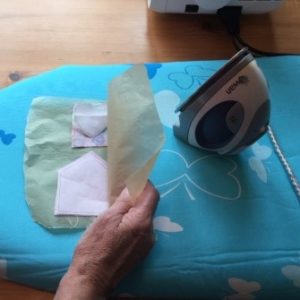 Place the Bondaweb pieces with the rough shiny side down (this is the glue side) on the wrong side of the fabric and press firmly for 30 seconds with a hot iron. It should be firmly stuck down when you lift the iron.
TIP: To avoid all risk of getting Bondaweb on your iron or board, it is always best practice to sandwich your fabric+Bondaweb pieces between two layers of baking/greaseproof paper.
Step 4: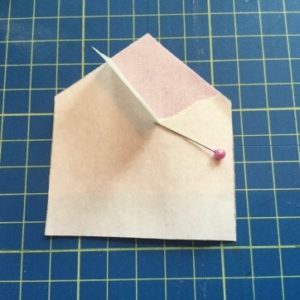 Let it cool, cut out the shapes and then peel off the backing.
TIP: if it won’t easily peel off, use a pin to tear the Bondaweb to get it started.
Step 5: Place the house, Bondaweb side down, in the centre of the square on the right side of the fabric and press it on. Then place the heart in the centre of the house and press. It is important that the house is in the centre of the square, otherwise this will look very messy when joined up with other squares, so do please measure carefully and place the apex of the roof on the centre line of your square and 2 cm from the top of the square.
To get the heart as centred as possible, use a ruler to line up the apex of the roof with the indent and point of the heart.
Step 6: Use whatever stitching you like to secure the two shapes – simple running stitch is fine, or you can use any other machine or handstitch you like. It is best not to add too much embellishment as this might detract from the impact of the simple shapes.
EXAMPLE 1 EXAMPLE 2 EXAMPLE
|
IF YOU DECIDE TO MAKE SEVERAL SQUARES, PLEASE DO NOT MAKE MORE THAN 2 DUPLICATES. WE WANT AS MUCH VARIETY AS POSSIBLE. Use of the same fabric for different shapes and combinations is OK in moderation.